Amateur Radio Station


Firware Upgrade: So now we have a bin file on our usb stck or on the computer where we are going to to do the upgrade. Most of the upgrade instructions are on the openwrt website at this and other url's. I ran an cable from the computer to the router lam port 1, performed a reset of the router and confirmed I could use internet explorer to access the router via 192.168.1.1. This ip address may not be the same for your router, search for it on the web and you will also find the default username and password. You will need all this info to proceed.
You will need to assign a static ip at the start to initially access the router. Go to control panel, network connections, click on local area connection, click on properties, select internet protocol tcp/ip and select use the following ip address. If your routers ip is 192.168.0.1 then put something like 192.168.0.5 in the ip address field, then put 255.255.255.0 in the subnet mask field. Click OK and exit out. You may have to unplug the lan cable on the router to force windows to use the ip.
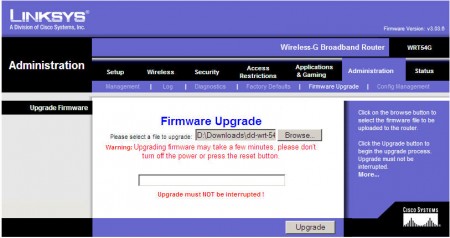
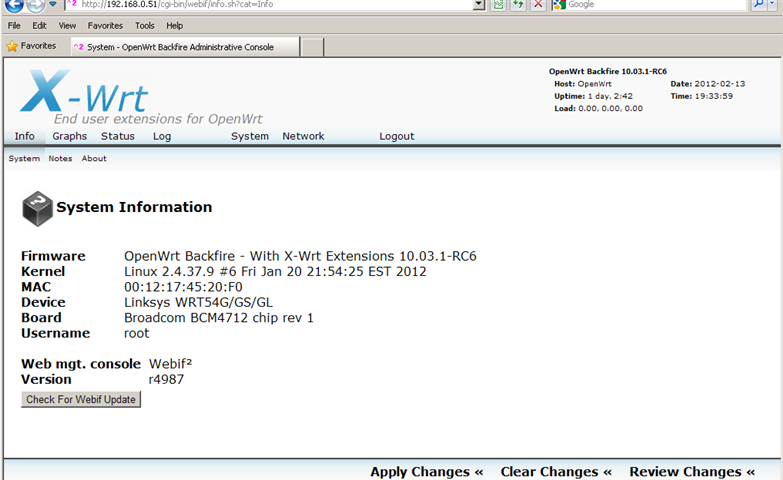
So after the reset, log into the router with the info you now have, you will see a linksys (or your brand of router) screen, go to the Administration tab and with any kind of luck you will see this screen. I sinply clicked browse, found the .bin file and clicked upgrade. It was as easy as that. A few minutes later I had a new firmware. I logged in again and was presented with the x-wrt admin screen. (Don't forget to look this up yourself. This is what I did, it may not work for you.)
Well it wasn't exactly like this at the beginning. The device immediately asks for a password. Before a password is entered, the device can be accessed with telnet and afterwards, telenet is disabled and the device is now accessed with SSH or a web browser. To have a backup plan incase you do something and can't get back into the router with SSH, then you can do a couple of things. Firstly, install a ttl to serial converter. This is explained in the openwrt documentation so I won't go over it again here. Secondly download Putty which allows access to the router over the lan cable in telnet or ssh plus some others. Either way It's good insurance as I had to get into failsafe mode many times.
This allows you to put the router back into the same state as a fresh firmware upgrade. For a dumb terminal program I've been using hyperterminal and when you access the router with a ttl converter you may have to experiment a bit to get the right baudrate although 115200 worked for me. You will likely need the converter to hook this up to a Byonics Tiny Tracker, others have used a usb to serial converter. So lets assume the converter is installed, the tracker is also installed and in kiss mode and the tracker baudrate is set to whatever you want yours set to. I have mine at 115200 baud. Here are my config files, anything I don't want the world to see I will comment out with xxxxxx's. Refer to the aprx documentation for further details.
So about the best thing you can do with x-wrt is to surf around and get familiar with it. Getting it connected to the web is a high priority also as the aprx part won't work without it, package updates or additions are not possible either. In a nutshell I shut off DHCP, created a vlan to connect ports 0,1,2 and 3 so the internet is connected to port 1 and the computer goes on any other port except the wan port.
Don't forget to check out google groups for APRX. The people there were helpful and sometime one can answer their own questions there by reading.
To Part 3 --- Configuring the router
APRX Config
mycall VE3TSA
<aprsis>
server noam.aprs2.net 14580
filter "m/75"
</aprsis>
<interface>
serial-device /dev/tts/1 115200 8n1 KISS
callsign $mycall
tx-ok true
</interface>
<digipeater>
mycall VE3TSA
<aprsis>
server noam.aprs2.net 14580
filter "m/75"
</aprsis>
<interface>
serial-device /dev/tts/1 115200 8n1 KISS
callsign $mycall
tx-ok true
</interface>
<digipeater>

APRS I-Gate from a Linksys WRT54g V2 Wireless Router Part 2
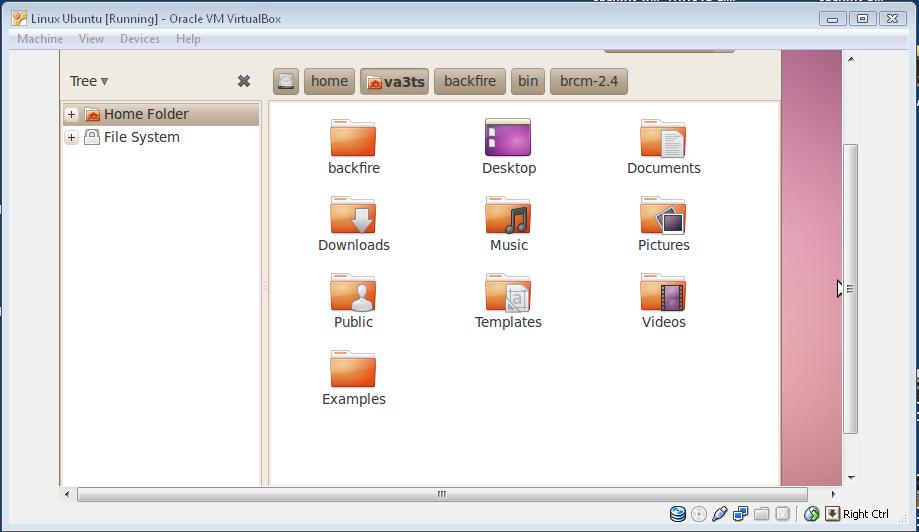
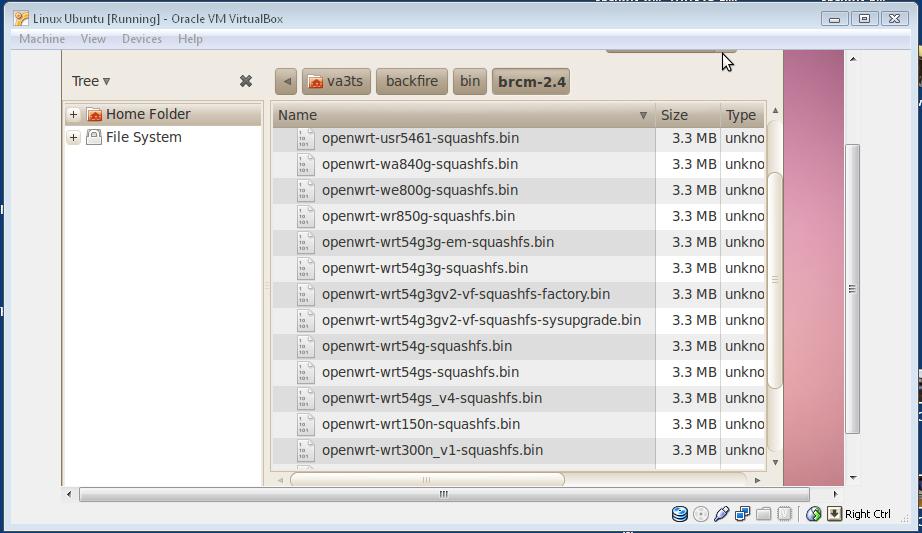
Bin Files: The next step is to find the files we just created and get them to a place where w can upload them to the router. The ubuntu screens below are a file manager, go the ubuntu app, at the top of the screen you will see Applications Places and System. In the Places menu select "Computer" and you will see a screen similar to the one shown. You probobly created a directory called backfire, so look for a directory called brcm 2.4 somewhere below that. That directory is shown below, notice that there are files for more than one router, matter of fact a bunch are compiled at the same time.
So the one I was interested in was the openwrt-wrt54g-squashfs.bin file. Now in my case I used a second computer which is running Xp as the platform for working with the routers. This way I could play as much as I liked and I was also able to access the web at any time with the Vista computer. But I also had to get the bin file to the other computer somehow, first time I did it with ubuntu email which worked fine and then I used the usb stick which worked better. At the top of the linux screen you will see a menu called devices, pick usb devices and go from there.
This is the .bin file I used for my wrt54g V2 which includes the aprx 2 package. If you have the same router you can use this. openwrt-wrt54g-squashfs
This is the .trx file openwrt-brcm-2.4-squashfs
transmitter $mycall
<source>
source APRSIS
relay-type third-party
</source>
</digipeater>
<logging>
aprxlog /var/log/aprx/aprx.log
</logging>
<beacon>
cycle-size 20m
beaconmode aprsis
beacon via TRACE1-1 \
symbol "I&" lat "4437.03N" lon "08103.33W" \
comment "Aprx v2.00 - Tx-iGate - http://www.gbarc.ca"
</beacon>
<source>
source APRSIS
relay-type third-party
</source>
</digipeater>
<logging>
aprxlog /var/log/aprx/aprx.log
</logging>
<beacon>
cycle-size 20m
beaconmode aprsis
beacon via TRACE1-1 \
symbol "I&" lat "4437.03N" lon "08103.33W" \
comment "Aprx v2.00 - Tx-iGate - http://www.gbarc.ca"
</beacon>